

NFT 101: A comprehensive guide to start creating & selling your art digitally on Sologenic
Why Use Non-Fungible-Tokens (NFT)?
Just like in the real world, art like drawings and paintings acquires value based on uniqueness. Considering that digital assets can be endlessly duplicated, NFTs allow artworks to be "tokenized" attaching them to a certificate of ownership, which can be sold.
Whether you are new to the Blockchain, or a crypto currency expert, this guide will teach you how to create an NFT and be able to list it for sale on the SOLO marketplace.

Key Terms in the Crypto World

Ledger
A ledger, in the cryptocurrency world, is a system that keeps track of all the transactions and balances between the participants of a network. This information is strictly numeric and encrypted so that the participant's identities remain anonymous.

Wallet Address
Your wallet address it’s like your email. It’s a unique code that can be created for free by anyone and be shared publicly so transactions are sent to this address. It looks like this: “rsoLo2S1kiGeCcn6hCUXVrCpGMWLrRrLZz”

Crypto Wallet
Just like in the real world, a wallet keeps your private information, such as keys and passwords, that give you access to your cryptocurrencies allowing you to send and receive assets. They can be fully digital, like the SOLO DEX accessible through the app, or they can be hardware wallets stored on devices like a USB stick.

Transaction Fees
Payments that compensate the computing energy required to process and validate transactions on a blockchain ledger.

Minting
The act of tokenizing a digital asset to guarantee its authenticity and uniqueness. A clear example would be uploading an artwork to the SOLO NFT Marketplace and issuing a token, a code, that guarantees ownership to collectors.
How to Mint an NFT Using Sologenic
1.
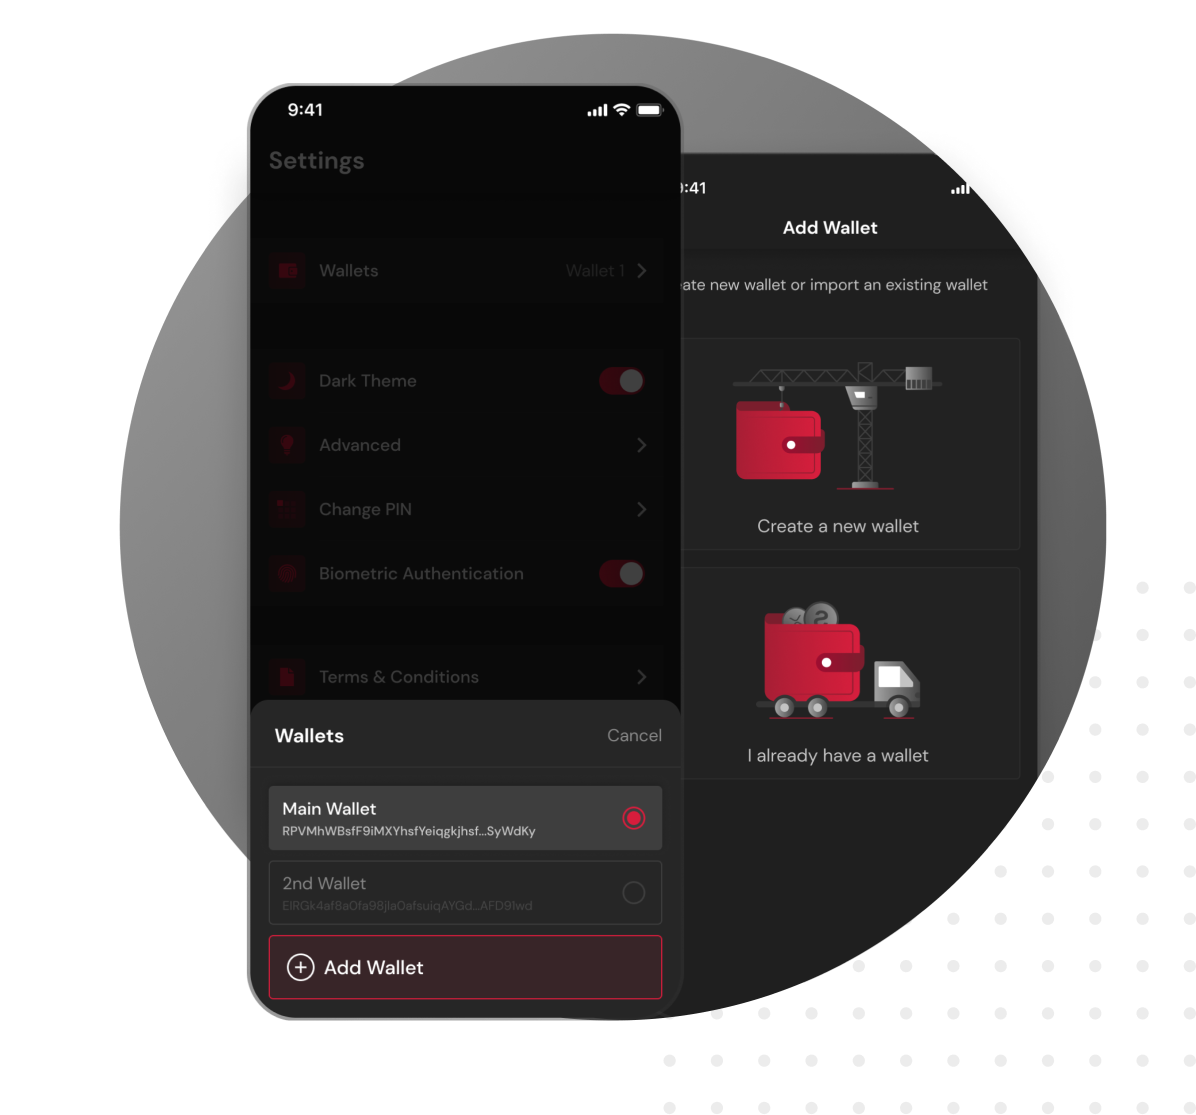
Setting Up Your SOLO Account
If this is your first time using the Sologenic ecosystem, you are gonna have to create an account, either using the SOLO DEX app, or, the sologenic.org website.
Just like in any other blockchain, you will need to set up your wallet in order to make transactions and trade NFTs. You can create a new wallet using the SOLO DEX app and after setting up a strong password, you will receive 12 recovery words in case you need to recover your wallet.
Alternatively, if you already have a wallet you can choose an import method between Passphrase and Wallet Secret. In both cases, the password you decide to use must be kept in a safe place. If the password is lost, there is no way to recover it.
2.
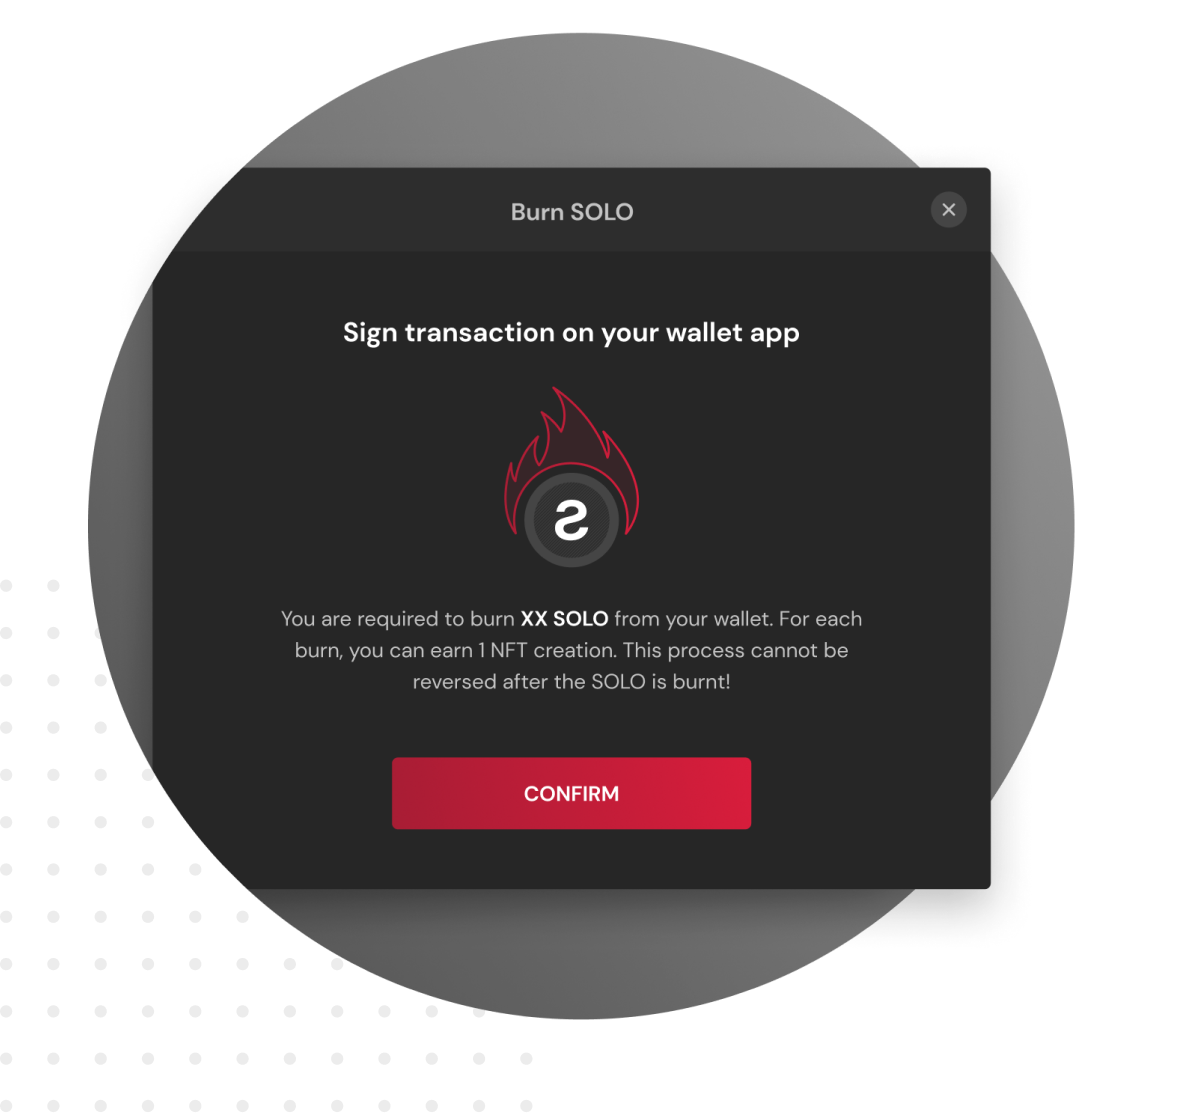
Burning SOLO Tokens
For every new NFT that you wish to create, it is necessary to burn SOLO.
A certain amount of SOLO will be burned instantly by being sent to the Sologenic gateway address (Blackhole) which is available to be reviewed on the blockchain.
Sologenic’s Gateway Address (Blackhole)
rsoLo2S1kiGeCcn6hCUXVrCpGMWLrRrLZz
3.
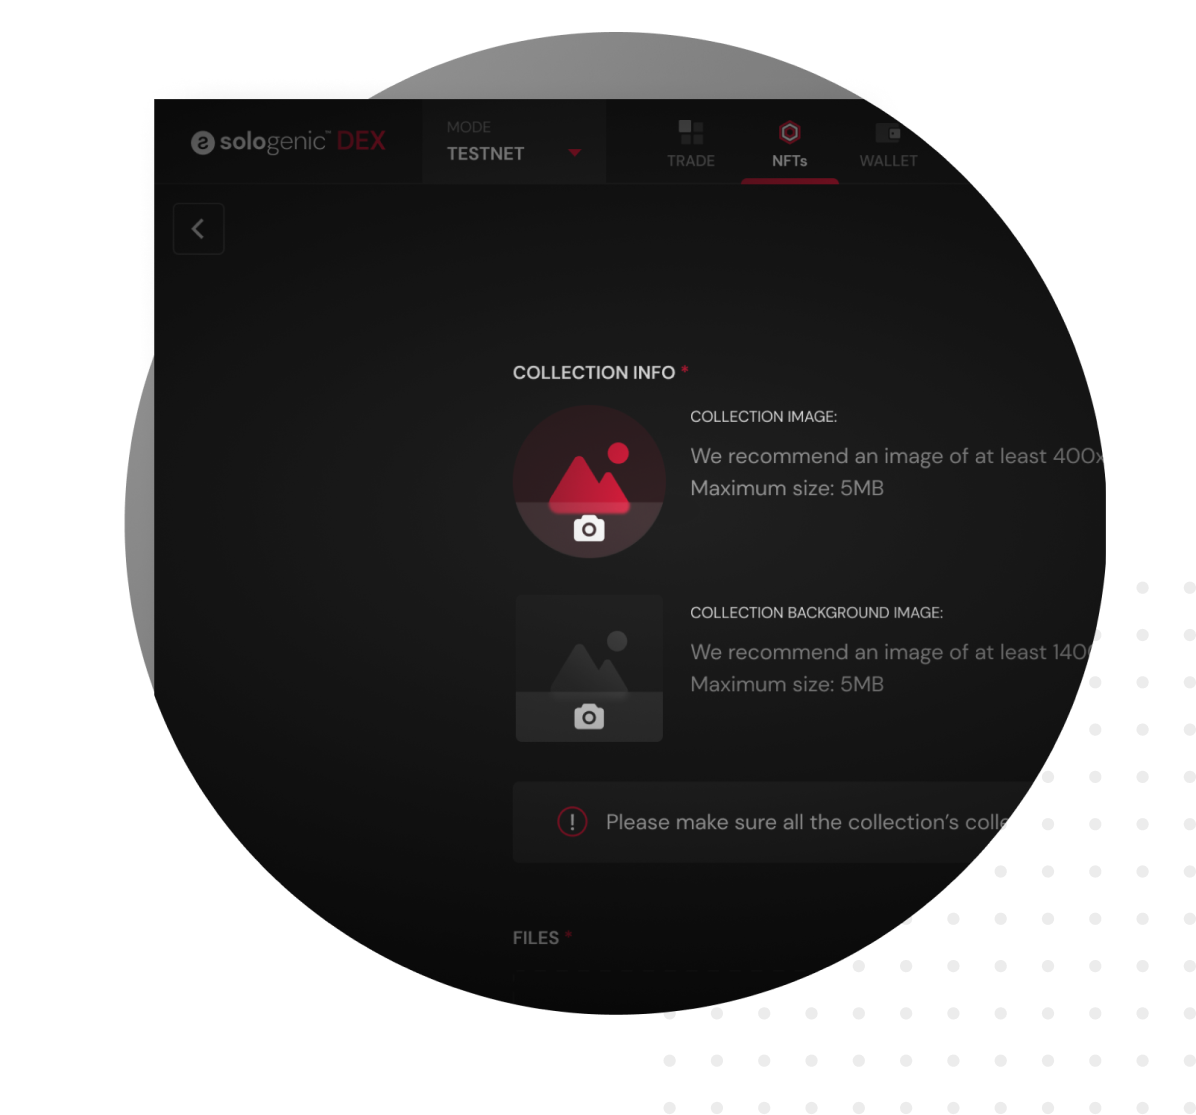
Creating Your First NFT Collection
Every time you create a new NFT you will create a new collection.
Each collection can have its own name, description, and a picture or GIF that represents the artworks included in the collection. Make sure this information is correct because once the collection is successfully uploaded, it cannot be edited.
4.
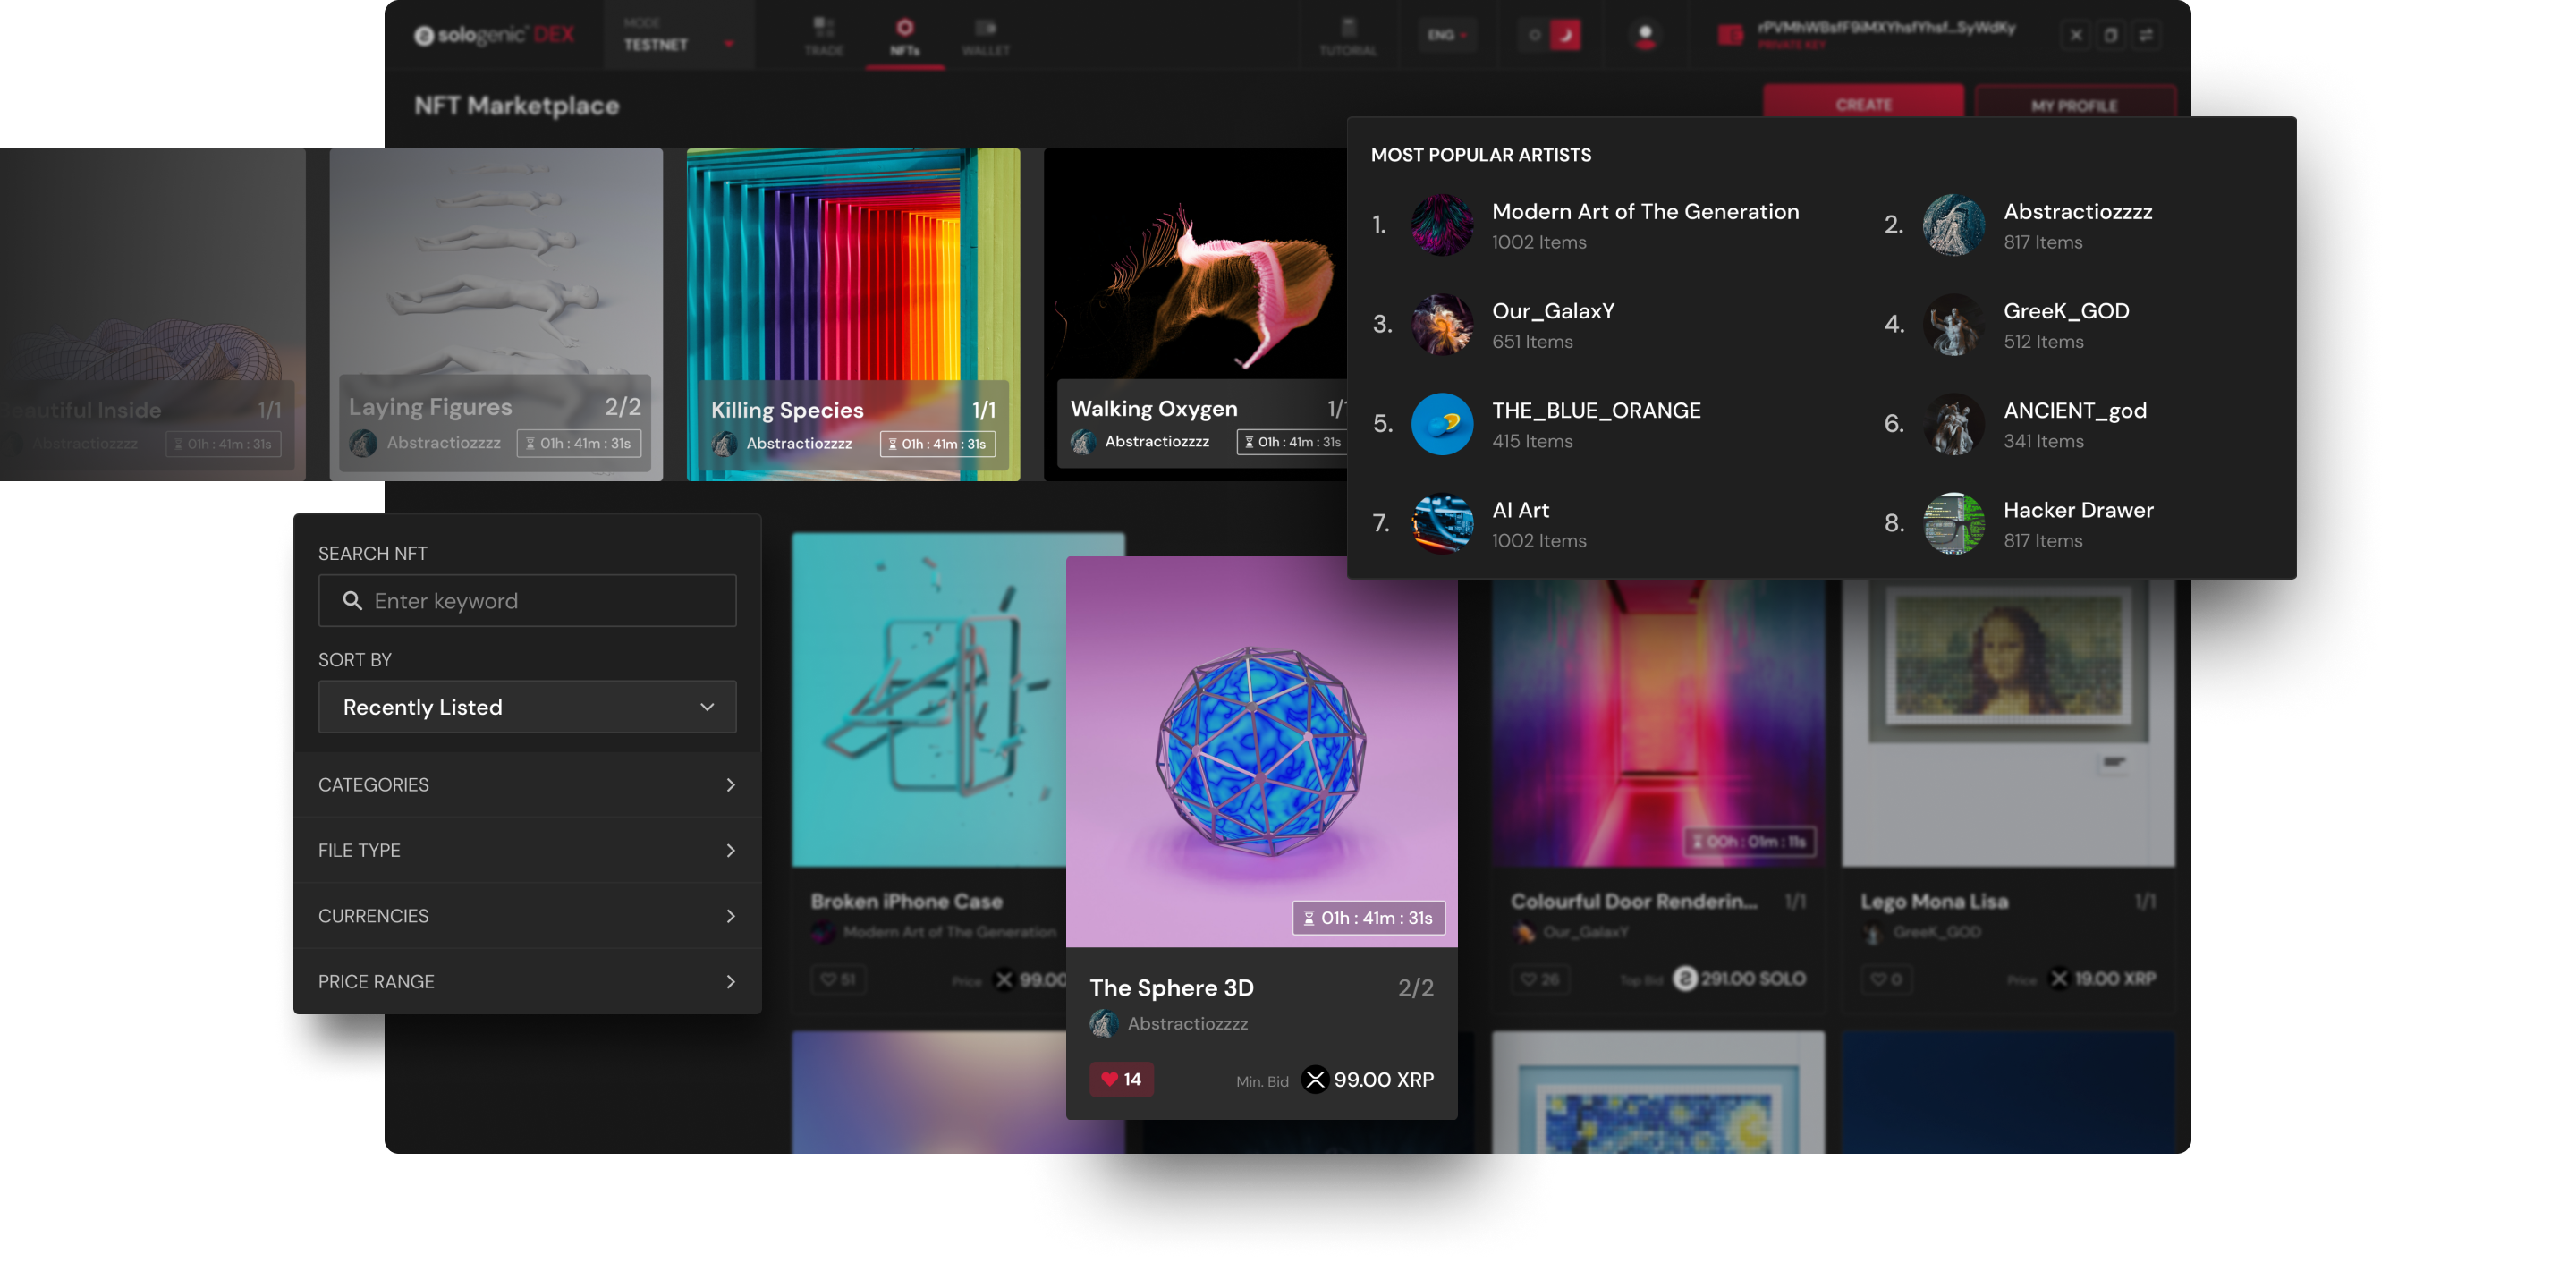
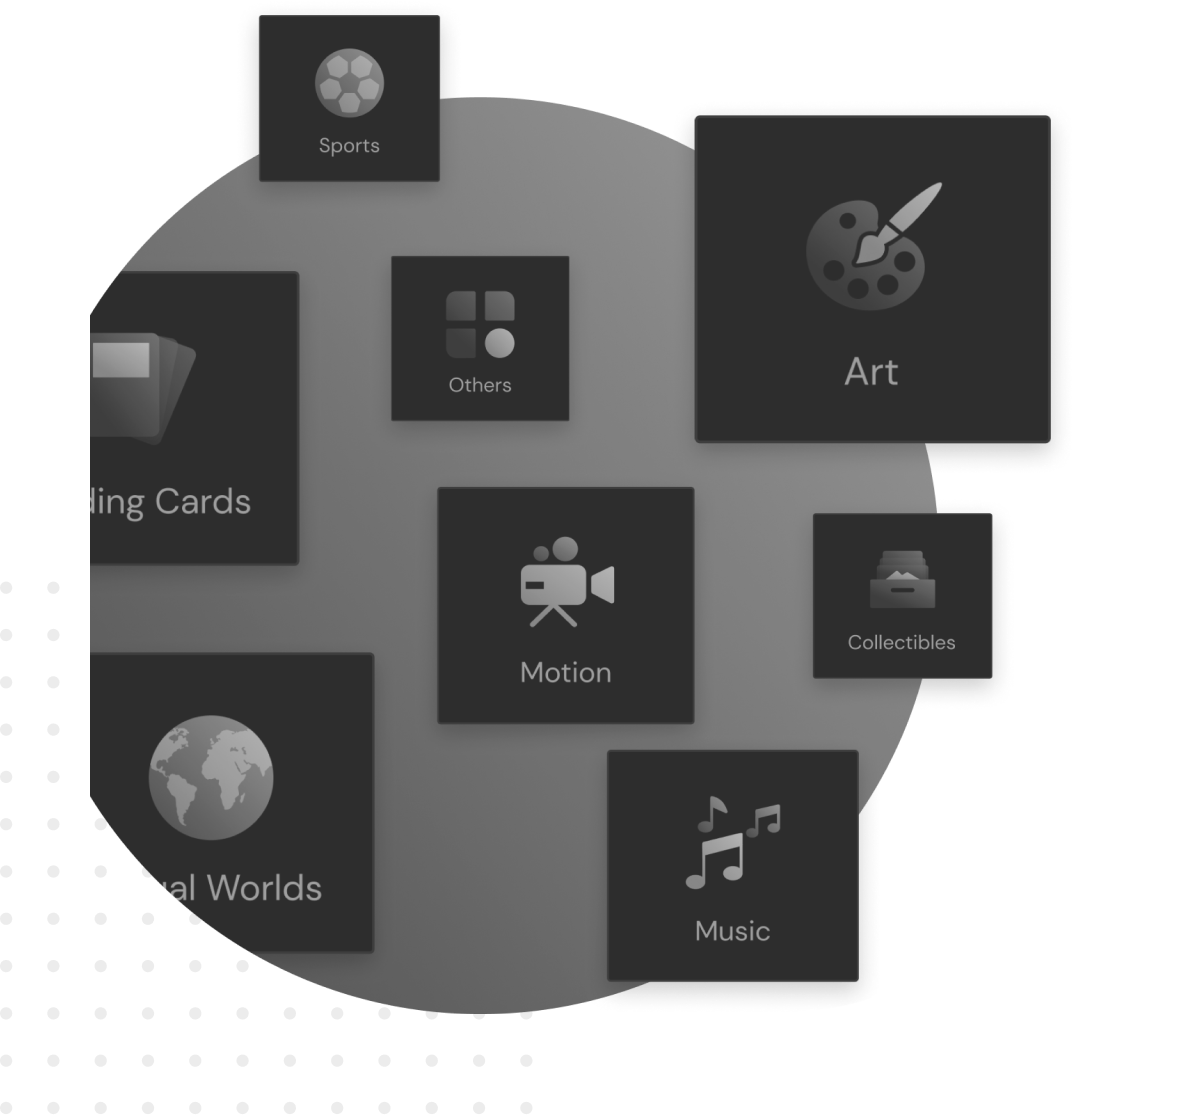
Selecting the Catagories
The SOLO NFT Marketplace has 8 different categories to match different types of artworks.
Make sure to check the file formats permitted for each category. Once you upload your file, you can add more information like a name, a description, and an external link where potential buyers can learn more about your art.
5.
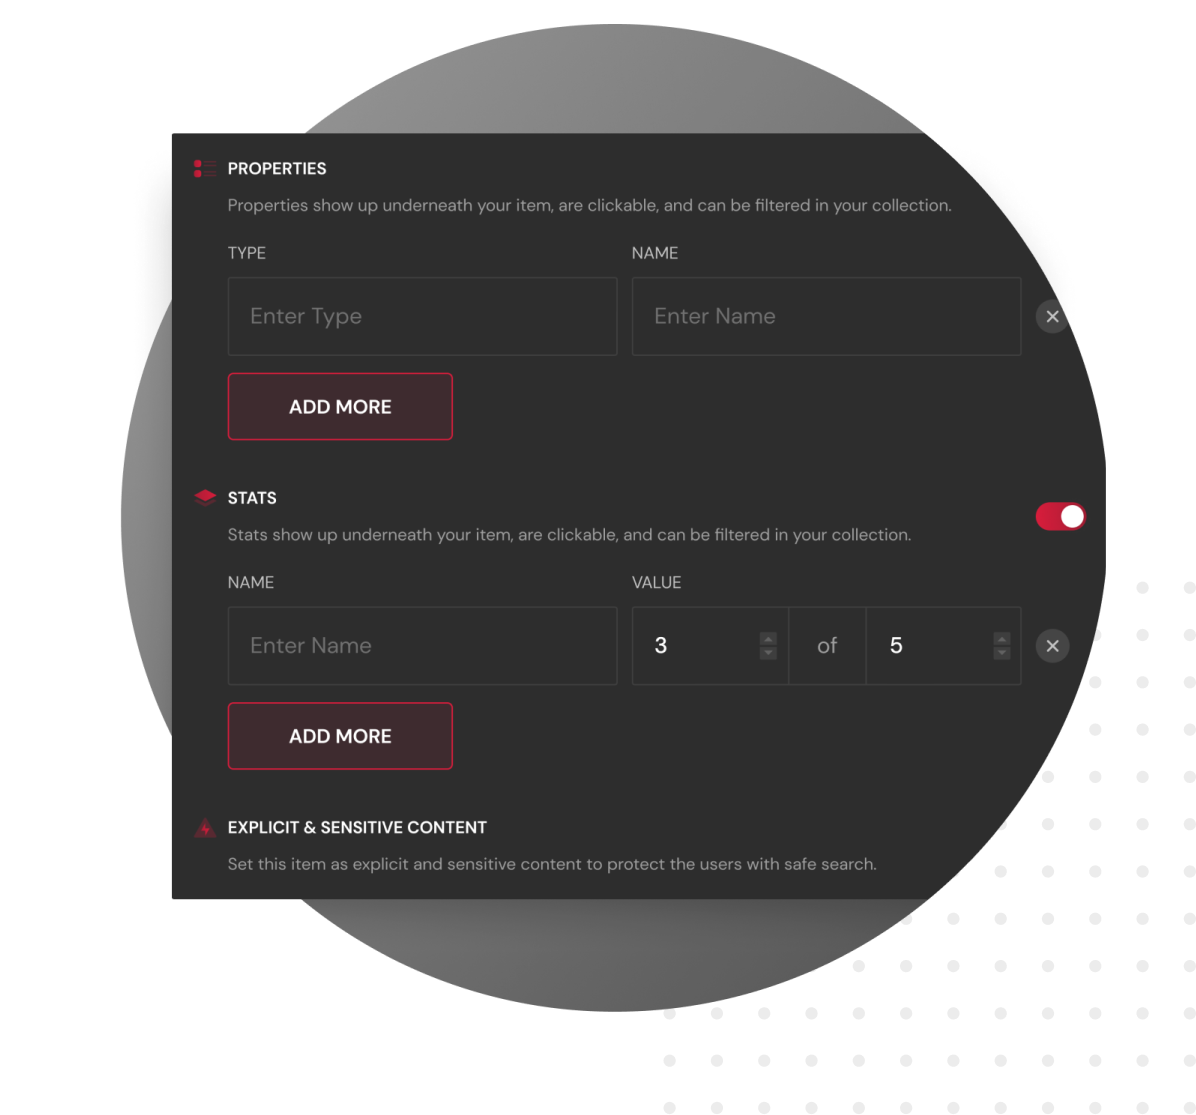
Adding Properties
In the properties section, you can assign certain attributes to your NFT that will show underneath the item and will be able to be used as filters when someone is browsing the marketplace. Properties are just pieces of information you can add to your NFT listing to let the collector or potential buyer know more about the particular item.
6.
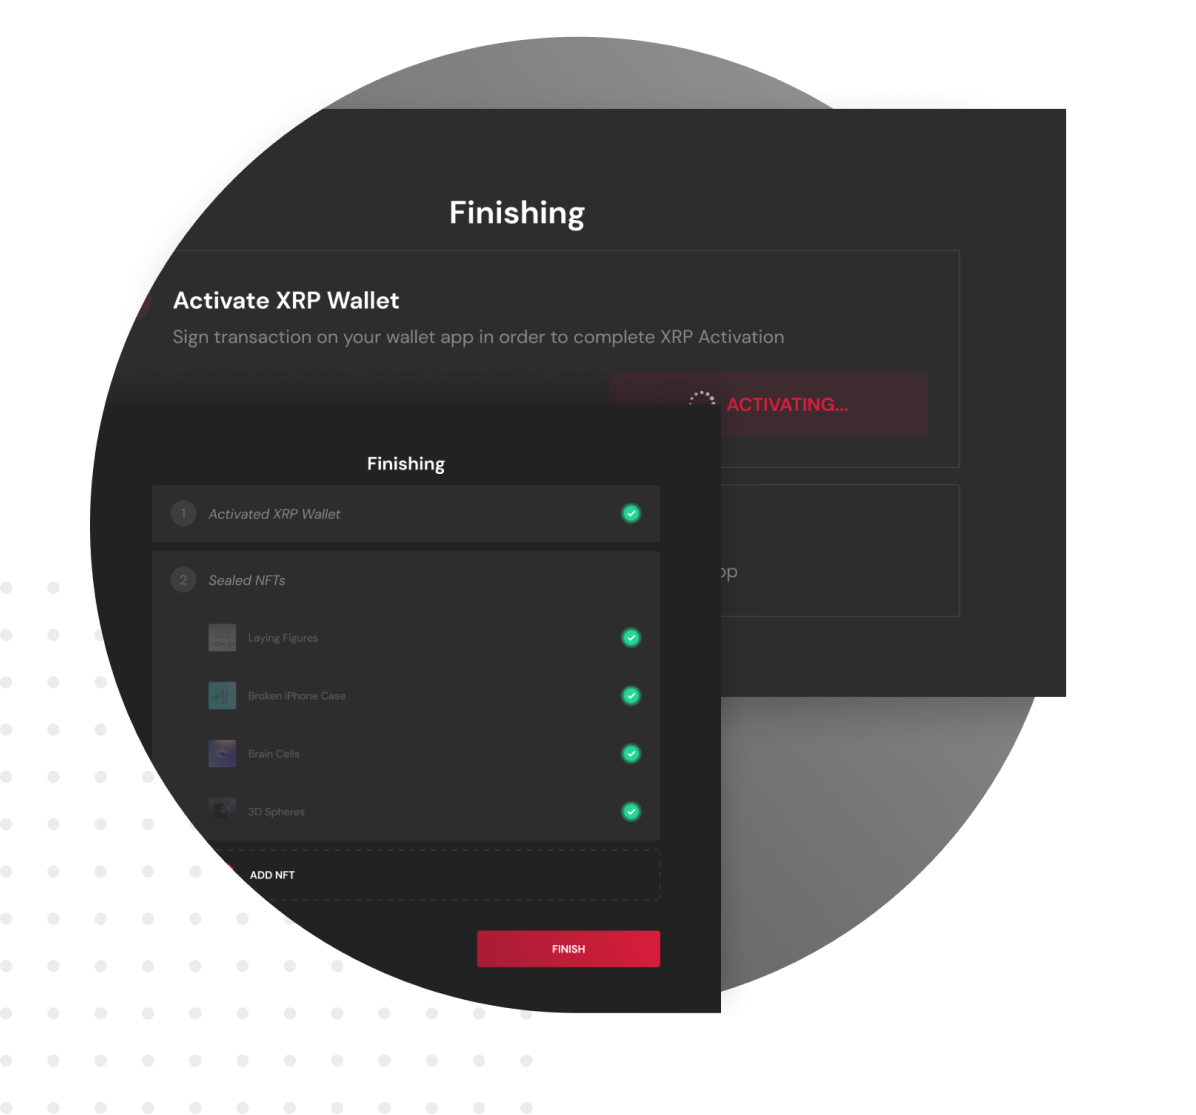
Signing the Transaction & Sealing Your NFTs
Once you have completed the process, there are a couple more steps you need to follow to complete the minting process. To validate and seal each NFT you will be prompted to sign the transaction using your Wallet, this process will be easy since a notification will be sent to your SOLO app with a summary of the transaction for you to review and sign.
Once every NFT has been sealed, you are all set. Click on the “Finish” button and proceed.
7.
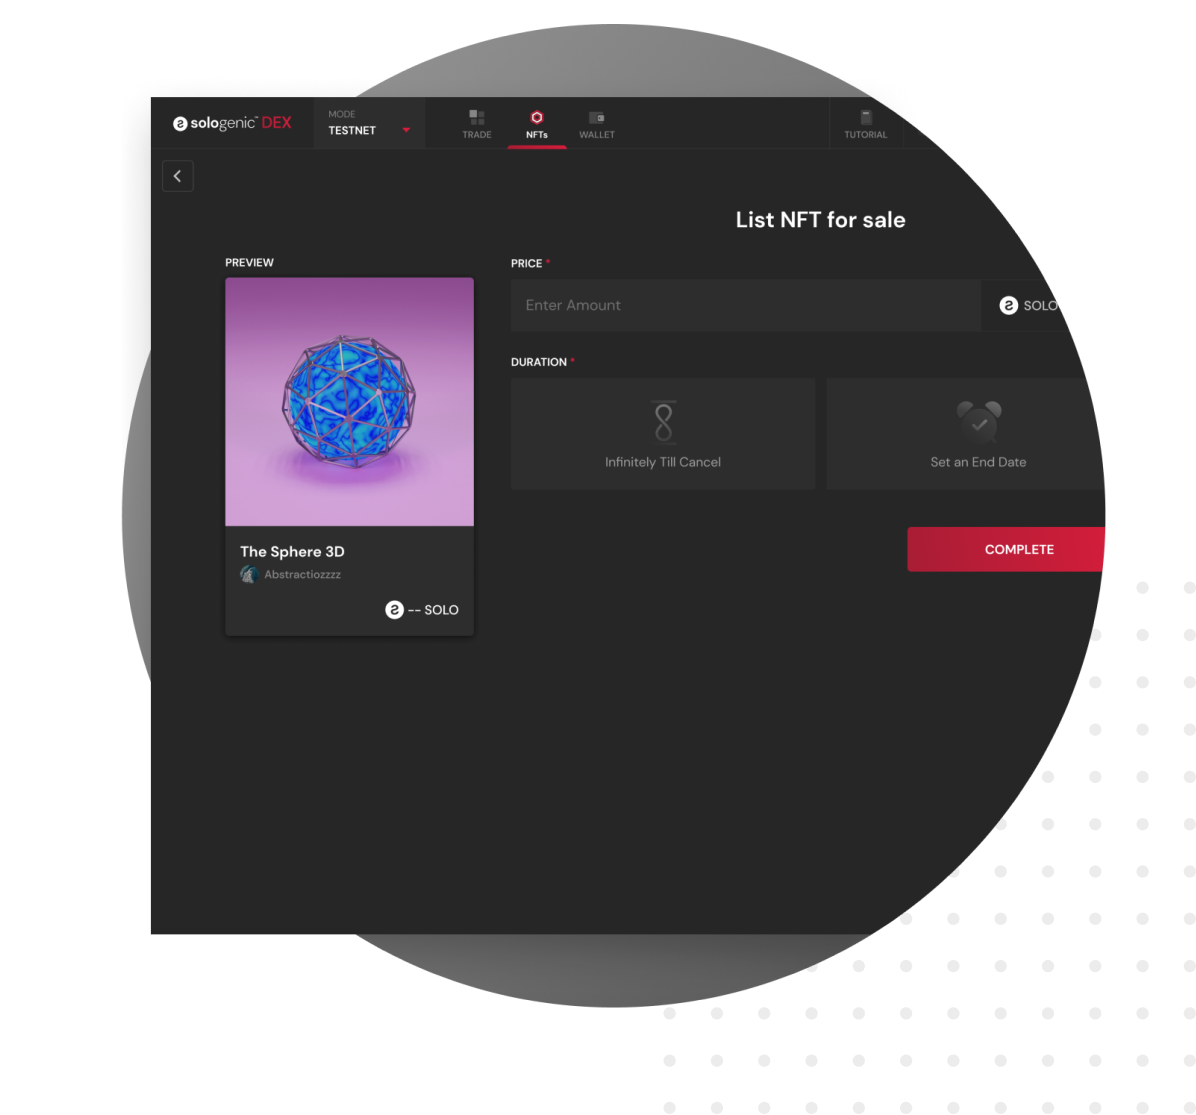
Listing Your NFT for Sale
Once your NFT has been minted, you can put it for sale by assigning a price in SOLO or XRP, at the moment. You can also add a duration for the on-sale period if you want your NFT to be available during a specific timeframe.
The bidding auction will be added to the Sologenic NFT Marketplace as soon as Ripple’s NFT XLS 20D Standard is released.

What Are the Fees?
Like we mentioned earlier on this page, a certain amount of SOLO will be burned instantly every time an NFT is created. On top of this fee, there is an XRP Network Fee that can be as low as $0.000005 USD.
How Can You Save More by Minting Multiple NFTs via One XRP Address?
We have made the process of minting NFTs super easy so that creators never feel limited by outrageous gas fees and leverage this new technology to share their passions. This is why you can upload multiple NFTs under one single transaction fee when uploading it as a collection.

What Are the Supported Categories?
The Sologenic NFT Marketplace supports 8 different categories. These categories can fit all sorts of artworks from static drawings, paintings, photographs, to live action clips, movies, collectibles, trading cards, sports tokens, and even parts of metaverse.

NFT 101 - Frequently Asked Questions
Have a question? Check our FAQ page to find answers all about the process of minting and listing NFTs.
NFT 101 - FAQ


Copyright © 2021 - 2024 Sologenic Development Foundation Limited. All rights reserved